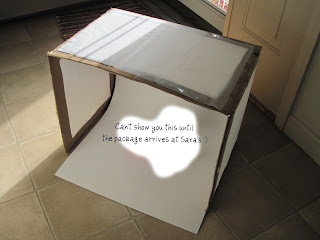
So after some searching around and looking at a few people who made their own, I set out to do the same. Finding a box was no problem as I have a husband who is a box
 If I was being perfect about it, I would have drawn lines with a ruler about an inch all the way around, like a border. But I wasn't being perfect about it. Using a box cutter, I just winged it and cut out the front and both sides. I found it easier to leave the front flaps on for extra stability and cut them off at the end.
 Then, cut a section of tissue paper large enough to fit over the openings. I just taped them on using scotch tape. You may need more than one layer of tissue paper depending on what kind of lighting you need.
 Cut a piece of white poster board to fit the inside of your box. The piece of a paper should not be folded, and should be a bit longer than the box.
  Find some good light. Since I only have one good "spotlight" lamp I just waited until a good amount of sunlight coming through my front door sparing me having to drag out lights or go outside in the cold.
 Even my Canon point and shoot can take this:
 Hope this helps anyone who needs to take close up pictures of anything! :)


No comments:
Post a Comment