


- 8 1/2 x 11 piece of scrapbook paper (one for each envelope that you want to make)
- envelope template
- contact paper
- exacto knife or sharp blade
- glue source (I used hot glue but there are probably more ways to get them to stick together. I just {heart} my glue gun.)
- optional – printable mailing labels
 Step 2: trim around to get rid of the excess paper.
 Step 3: These next couple steps are optional as you don’t have to cover your envelopes in contact paper. But I really didn’t want to be making envelopes every month, so I figured this would help them be a bit more durable. So, cut out two pieces of contact paper, one for each side of your flat envelope.
 Step 4: probably the hardest step for a perfectionist like me. I found after a lot of trial and error that the contact paper went on with fewer bumps if I laid the paper on a flat surface. Then, I pressed the contact paper to one end of the envelope and slowly rolled it forward, pressing as I went. Does that make sense?
 Do this to both sides, so your paper is sandwiched in between.
 Step 5: cut out around the outside of the envelope shape. Here were a few of mine after cutting.
 Step 6: with an exacto knife or some other sharp blade, score along the dotted line. This will make the envelope easier to fold. No, I’m not left handed, but was having trouble getting a picture any other way.
 Step 7: fold along the scores
 Step 8: There are many ways you could get these envelopes to stay together. I pretty much have my hot glue gun plugged in all the time, so that’s what I chose to use. I just spread some on, not quite all the way to the top.
 Fold the large flap up and press firmly to smooth out. If you take too long, the hot glue will make the envelope bumpy, so try to move quickly.
 Repeat with the other side.
 Step 9: I bought a pack of sticky velcro dots. Apply one side of the sticker to the middle top of the envelope flap.
 Then, put the other velcro side down on top. Make sure the sticky side it out!
 Then close your envelope.
 And your velcro will match up perfectly.
 And you’re done! Repeat as many times as how many envelopes you need. Here are all mine before I labeled them.
 And here they are all nice and labeled. I just used a pack of printable Avery labels (the return address size) and ran them through my printer. You could label your envelopes in many ways, even just with a sharpie.
 They fit dollar bills perfectly!
 I also made a little record sheet that goes in each envelope so I can track just like in my checkbook. Does anyone even use a checkbook anymore? Haha.
 Ohh, aren’t they all so pretty in their box? They’re so cute they {almost} make me thankful to be on a cash system.
 Happy budgeting!
***EDITED TO ADD***
I've have several people ask for the little budget sheets I put inside my envelopes. Here they are! Just print and cut!

 So she’s really almost 7.5 months, but shhh she’ll never know I posted this late. :) I hate that 7 months means we’re on the downhill slope to being 1. Not yet, not yet. It’s going too fast.
  New Things She's Learning/Doing: We're starting to hear tons more consonant sounds in her talk. There are times I swear she is saying mama, mama. Her sweet little girly voice just melts my heart. Although she still has a very loud screech going on sometimes. She sits, can get down back onto her belly, and is a rolling machine. She can get exactly where she needs to go by rolling or scooting backwards and I don’t think it will be but a few more days before she’s crawling! She’s banging toys together and is clapping her hands so adorably. She is also starting to let Owen know that she is not happy with him when he takes away a toy from her.
 Sleep: Well, I think I jinxed myself by thinking she was going to be a better sleeper. Well, during the day time she is. She takes 3 naps that are pretty predictable and just jabbers for awhile and puts herself to sleep. Night time has moved up quite a bit and usually she needs to be in bed by 6 or 6:30. She does a good stretch until 10 or 11, but then she thinks she’s a newborn and gets up every 2 hours wanting to “eat.” Uggh, gotta change this somehow!
 Food: Well, we took a week or so off of food because the poor thing got sick. Runny noses and coughs from babies are so awful. So she didn’t have much of an appetite and I wanted to pump her full of breast milk, so just in this last week, she’s started eating “solids” again. Pretty much loves it all so far and is still the messiest eater I’ve ever seen.
 Randoms: Still loves loves loves her brother. Opens her mouth to give “kisses.” And still keeps her headbands on. That’s my girl!
 Love you so much Ellison Jakeh!!


 Welcome to Pinned It, Did It Monday where I show you the pins I’ve actually done from Pinterest. I like to hold myself accountable to doing some things I find on there. Otherwise, I just get sucked into getting on there and thinking I don’t cook well enough, do enough creative things with the kids, or have a pretty enough home. Baby steps.
 I knew I wanted Ellison to have a ruffled skirt to go along with her turkey shirt for Thanksgiving last week. I pinned about 10 different skirts and after a short browsing, settled on Dana from Made’s layered skirt. I LOVE this woman’s blog and her tutorials are always very detailed and easy to follow.


 My review: This was NOT a one nap project. Haha. I had a bit of a learning curve with the ruffles, each layer, and then the elastic waistband. I also encourage you to read the pattern all the way through lest you start cutting your strips and realize that you cut them all about an inch too narrow because you forgot to take hemming and seams into account and then have to make 3 more. Oh well. It was fun to learn how to do ruffles and I think (as long as you don’t look too close) the finished product turned out adorable!
 For turkey day this year, I was on for bringing sweet potatoes. I’ve never actually made sweet potato casserole before, so enter: Pinterest.
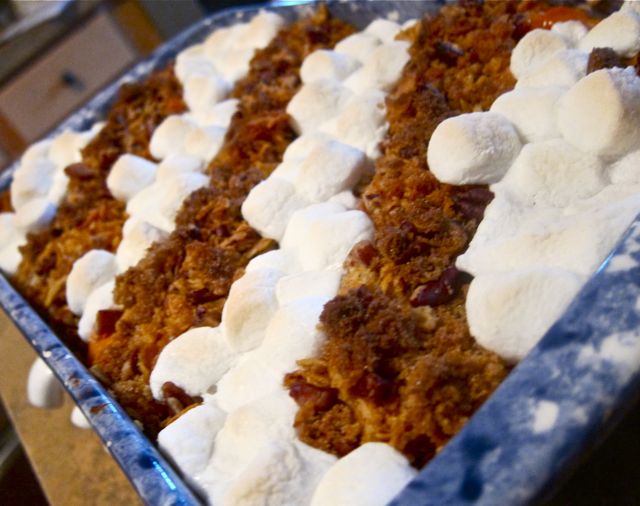
 My review: Absolutely delish! When I got to my mom’s house I realized I left the cornflakes at home and of course, no stores were open. The only cereal she had in her cabinets were some stale cheerios. But I used them (only about half the amount that was called for) and they were still fabulous.