


 This is our guest/craft room after we took out the bed and started getting ready for our garage sale. I will also say that I was emptying out all my craft boxes and going though them. But oh yeah, it looked like for a good couple months. During this time, Miles’ nursery plan went through a couple revisions. Originally, I had my heart set on doing a wood or pallet wall. Kinda like this:
(source)
I priced reclaimed barn wood and knew quickly that wasn’t going to happen. Then I looked into doing it ourselves with pallets. But the larger my stomach got, the less that large of a DIY project seemed appealing. William was also worried about how to be sure all the pallets were treated in a way we’d want on a nursery wall. I also looked into “wood” wallpaper. Again, not quite in the budget range I was trying to stay in. So I abandoned my original idea and started to fall in love with this color scheme: And these were a few of the inspiration nurseries I found on Pinterest that I liked:
 So remember when I was 30-something weeks pregnant with Ellie and painting her stencil on her wall swearing I would never do that again? Hahahaha. Never say never. I decided that to do this color scheme, the cream trim in his room and on the doors would have to go. So William prepped and I spent a week carefully painting 2 coats of trim. Not for the faint of heart, I tell ya. But oh is is beautiful. Luckily, the doors for the basement (oh yeah, I haven’t blogged about that yet have I?) were getting painted around this time, so Miles' closet doors and the back of the main door to the room were painted by someone who knew what they were doing. Because all the outlets were beige as well, I have to give major props to William for being willing to buy all new white ones AND install them for me.
And these were a few of the inspiration nurseries I found on Pinterest that I liked:So remember when I was 30-something weeks pregnant with Ellie and painting her stencil on her wall swearing I would never do that again? Hahahaha. Never say never. I decided that to do this color scheme, the cream trim in his room and on the doors would have to go. So William prepped and I spent a week carefully painting 2 coats of trim. Not for the faint of heart, I tell ya. But oh is is beautiful. Luckily, the doors for the basement (oh yeah, I haven’t blogged about that yet have I?) were getting painted around this time, so Miles' closet doors and the back of the main door to the room were painted by someone who knew what they were doing. Because all the outlets were beige as well, I have to give major props to William for being willing to buy all new white ones AND install them for me.
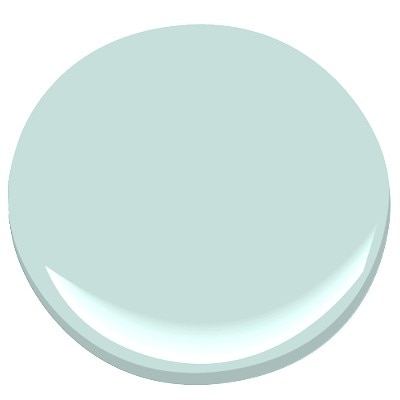
The next step was picking a color. While I was researching nurseries, I saw this blue/aqua/sea green color coming up a lot and several bloggers mentioned using the color Iced Green from Benjamin Moore. I got a small sample from Do It Best Hardware and it was exactly what I was picturing in my head!
 After I got all the trim done, I wasn't quite sure what I had gotten myself into. Thankfully, my mom came to the rescue to help with the rest of it. Her and William did one coat on Friday night and knocked the other one out Saturday morning.
  Owen and Ellie were great helpers (NOT).
 Then after the paint was done, we put together his crib and dresser. It felt awesome to finally get some of the big stuff done so I could focus on more of the fun little details.
 Ta-da. Paint done and crib is assembled!
 And here is the adorable light I found at Target next to a sweet little owl I picked up a long time ago at Prairie Gardens.
  I’ll post a few more of the individual crafts projects I did and then show you a full tour of his room!


 Enter: my mom. This is how she organizes all her recipes. I saw it last year and wanted it. So she was super kind and bought me everything I need. Tons of large index cards, 2 plastic tubs, and some labels.
 My goal is to get every recipe onto one of these 4x6 cards. Either cut from a magazine, printed from the internet, or handwritten:
 Then I just file them under their correct labels like appetizers, chicken, cookies, fish, etc. It makes the recipes very easy to find. And I can pull all the recipes I'm using that week for dinners and make my grocery list!
 My mom has 2 or 3 of these tubs all done. She writes right on the card any changes she did and how they liked it, etc. Or just tosses the card if it gets a thumbs down. Someday, all my recipes will be easy to find. I’m trying to get a few done each week. Slow going, but I already love the new system. How do you organize all your yummy recipes?
 **ETA – Used a acid-free glue stick to put my recipes onto the index cards. And Lindsey asked which categories I used so here’s my list. I started with all the “basics” and then added as I came to a recipe that I didn’t know how to file. So these may be different for you:


 It’s Monday. And amidst the craziness of having people in my house all week, I got a few things done that I’ve pinned from Pinterest. 2 cleaning ones and a simple “dessert.”
 Is your tupperware drawer as messy as mine was? Oops, forgot to take a picture of how bad it was. But trust me, it was bad.
 Review: Um, duh, why did I think of this? I just bought a cheap dish rack at Wal-Mart, but they even have some at the dollar store. My lids were all over the place and now they are easy to find! I wonder how long they’ll stay like this.
 Nothing better than caramels in the fall!

 Are your rings filthy?
 My review: This short video gives you 3 ways to clean your ring. I must say I’m still madly in love with my engagement and wedding ring. William did a pretty amazing job with them. :) I used the ammonia method, but did also use a toothbrush. The pictures don’t do justice how much cleaner they are! I love how sparkly they were after only a few minutes of cleaning. So pretty!