


 This is our guest/craft room after we took out the bed and started getting ready for our garage sale. I will also say that I was emptying out all my craft boxes and going though them. But oh yeah, it looked like for a good couple months. During this time, Miles’ nursery plan went through a couple revisions. Originally, I had my heart set on doing a wood or pallet wall. Kinda like this:
(source)
I priced reclaimed barn wood and knew quickly that wasn’t going to happen. Then I looked into doing it ourselves with pallets. But the larger my stomach got, the less that large of a DIY project seemed appealing. William was also worried about how to be sure all the pallets were treated in a way we’d want on a nursery wall. I also looked into “wood” wallpaper. Again, not quite in the budget range I was trying to stay in. So I abandoned my original idea and started to fall in love with this color scheme: And these were a few of the inspiration nurseries I found on Pinterest that I liked:
 So remember when I was 30-something weeks pregnant with Ellie and painting her stencil on her wall swearing I would never do that again? Hahahaha. Never say never. I decided that to do this color scheme, the cream trim in his room and on the doors would have to go. So William prepped and I spent a week carefully painting 2 coats of trim. Not for the faint of heart, I tell ya. But oh is is beautiful. Luckily, the doors for the basement (oh yeah, I haven’t blogged about that yet have I?) were getting painted around this time, so Miles' closet doors and the back of the main door to the room were painted by someone who knew what they were doing. Because all the outlets were beige as well, I have to give major props to William for being willing to buy all new white ones AND install them for me.
And these were a few of the inspiration nurseries I found on Pinterest that I liked:So remember when I was 30-something weeks pregnant with Ellie and painting her stencil on her wall swearing I would never do that again? Hahahaha. Never say never. I decided that to do this color scheme, the cream trim in his room and on the doors would have to go. So William prepped and I spent a week carefully painting 2 coats of trim. Not for the faint of heart, I tell ya. But oh is is beautiful. Luckily, the doors for the basement (oh yeah, I haven’t blogged about that yet have I?) were getting painted around this time, so Miles' closet doors and the back of the main door to the room were painted by someone who knew what they were doing. Because all the outlets were beige as well, I have to give major props to William for being willing to buy all new white ones AND install them for me.
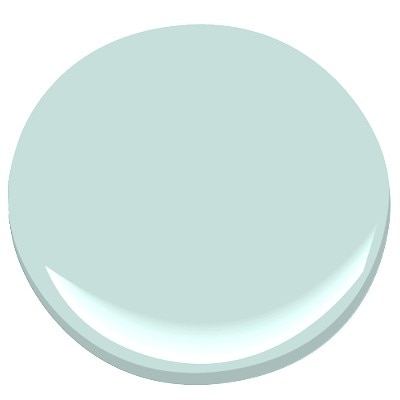
The next step was picking a color. While I was researching nurseries, I saw this blue/aqua/sea green color coming up a lot and several bloggers mentioned using the color Iced Green from Benjamin Moore. I got a small sample from Do It Best Hardware and it was exactly what I was picturing in my head!
 After I got all the trim done, I wasn't quite sure what I had gotten myself into. Thankfully, my mom came to the rescue to help with the rest of it. Her and William did one coat on Friday night and knocked the other one out Saturday morning.
  Owen and Ellie were great helpers (NOT).
 Then after the paint was done, we put together his crib and dresser. It felt awesome to finally get some of the big stuff done so I could focus on more of the fun little details.
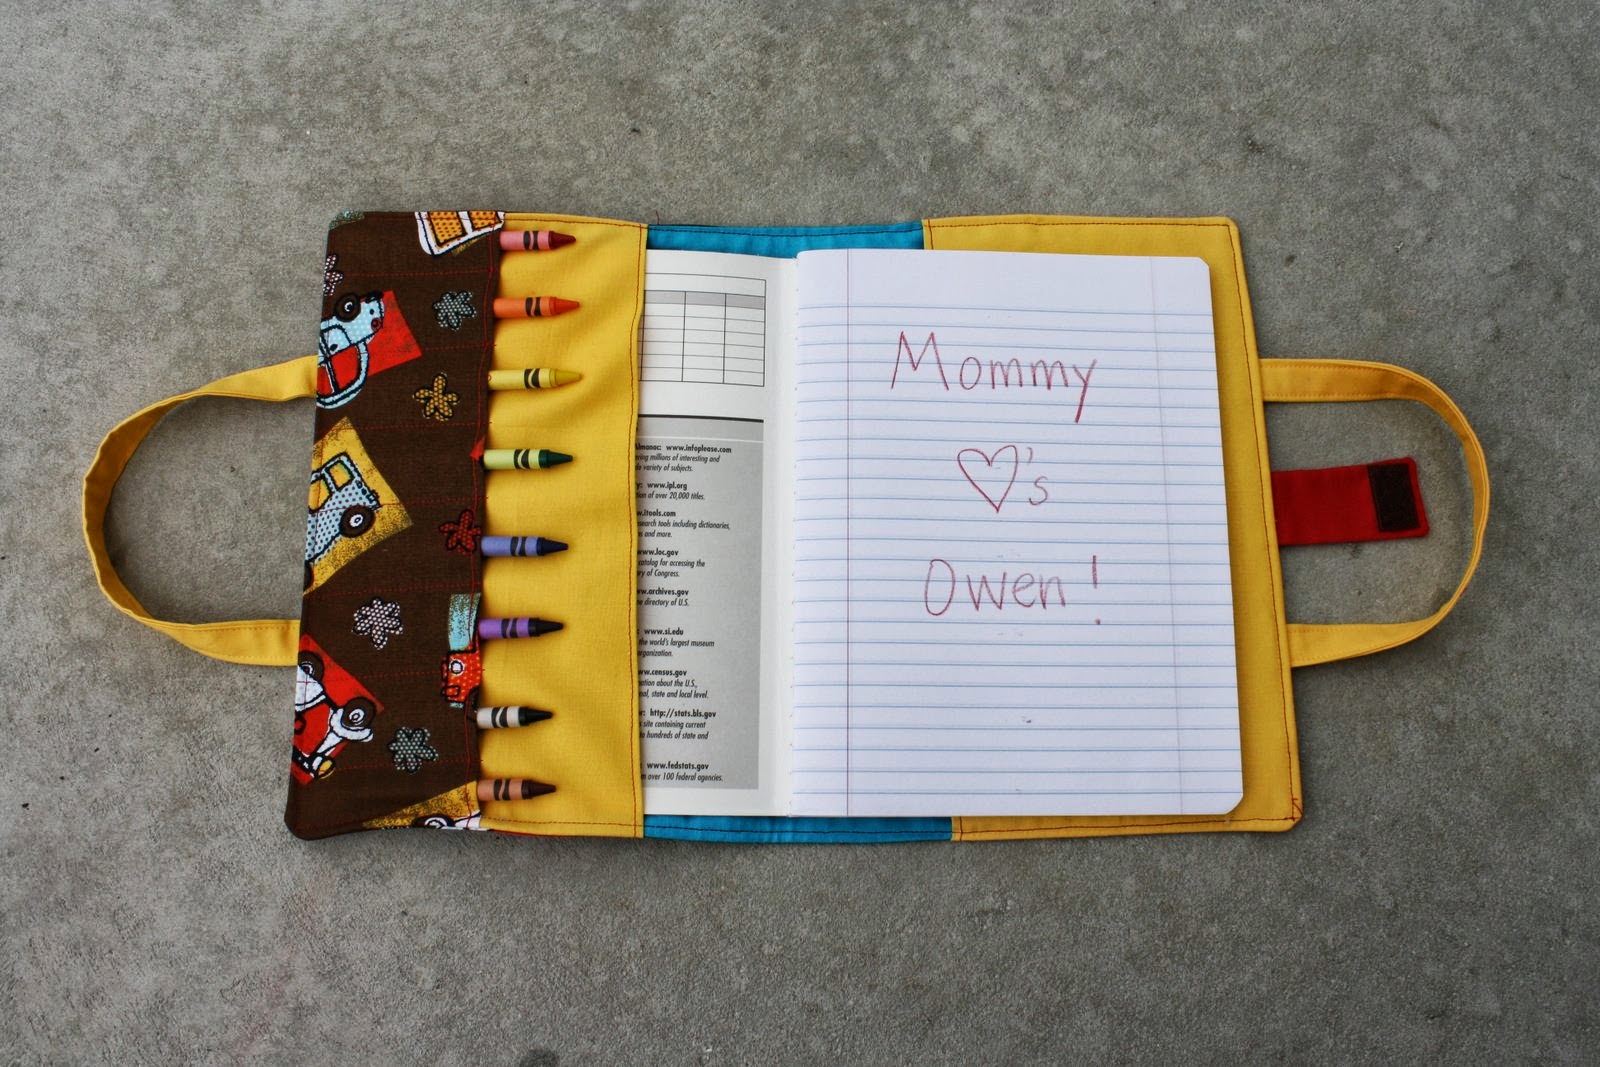
 Ta-da. Paint done and crib is assembled!
 And here is the adorable light I found at Target next to a sweet little owl I picked up a long time ago at Prairie Gardens.
  I’ll post a few more of the individual crafts projects I did and then show you a full tour of his room!


 What is this you say?! Welcome back to Pinned It, Did It Monday. Just for this week folks. And maybe you’ll see this pop up a little more this summer as our schedule is just full of fun things! If you’re new to the blog (welcome!) Pinned It, Did It Monday is where I share a few of the things I’ve actually DONE from Pinterest. It’s a site that can suck you into hours of just looking at good ideas. But I want someplace to be accountable to actually doing some of them. :)
 Picture I pinned:
 As summer is upon us, we love us some good sweet corn. But I do hate the process of shucking it and getting all those pesky hairs off. Then I saw this idea. And my life will never be the same.

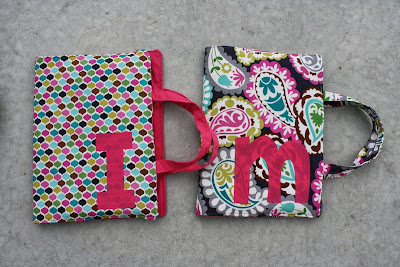
 As a car-loving boy, Owen always has problems of carrying his most loved cars (of the hour) from one place to another. We carry them from room to room and upstairs and down after nap. So I wanted a quick easy bag for him to throw some cars in.
  Source:


 My review: As much as I try to stay away from licensed, commercial type things. . .he’s falling in love with the Cars movie characters, so I grabbed some fabric that reflected that. The pattern was a good, beginning bag pattern and would be great to tweak for all sorts of fun totes. And it’s already had a lot of use, which makes it a worthwhile project in my book.


