




I just couldn’t land on anything I loved. I’m not a “themey” person when it comes to my kiddo’s rooms, so I had colors in mind but not a shape. I was going to just do a cute circle one with my leftover fabrics and then I spotted this on Etsy: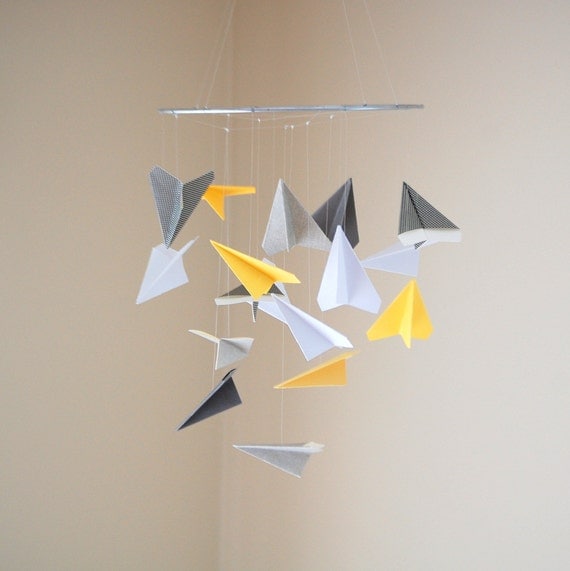
(source)
Adorable, expect for the price tag and I wanted to add a few more pattern instead of just solid papers. So I busted out my trusty glue gun and got to making one myself. Here were all the supplies I used:- 2 wooden embroidery hoops – 8” and 10”
- paint for the hoops
- hot glue gun
- about 8 different scrapbook papers in gray, yellow, and white
- fishing line – I wish now I would have used line that was a bit thinner and more transparent, but you can’t be picky when you’re nine months pregnant and doing craft projects
- little white hook to attach everything to the ceiling


2. I only used the insides to my embroidery hoops, not the outside part that has the hardware on it. You can discard that part (or save it for another project). Then I started by painting my hoops with a gray spray paint I had and hated the coverage and color. So I switched and did 2 coats using a acrylic craft paint and loved it much more.
 3. Make your airplanes! There are a million different ways to make your paper airplanes. Look here for some good examples here. After lots of trial runs, I decided I wanted something very simple with very few fold lines.
- I cut my paper into 4.5” x 5” rectangles.
- fold your paper in half
- open it back up and fold each top corner down and line up with the fold down the middle
- fold in half again
- Take each side and fold down so the top fold line, lines up with the bottom of the plane. Does that make sense?
- And that should make your simple airplane!
- I hot glued it together in all the places it could come unfolded and while the glue was still hot, I stuck in a long piece of fishing wire to hang it


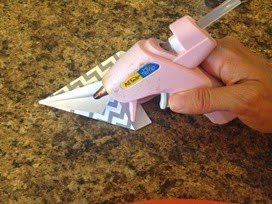


5. After I made lots of airplanes, I tied them loosely around the hoops to figure out how I wanted to space them, which colors I wanted where, etc. When I was happy with the placement, I tied the fishing wire as tight as I could and added a small dot of hot glue to secure it. Then I cut off the excess fishing wire. (the beginning stages of mobile is hanging from the ceiling fan in this picture)
 6. Lastly, William helped me measure and hang it from the ceiling just using a little white hook.

 I love how it turned out and I hope Miles enjoys this view from his bed.


 This is our guest/craft room after we took out the bed and started getting ready for our garage sale. I will also say that I was emptying out all my craft boxes and going though them. But oh yeah, it looked like for a good couple months. During this time, Miles’ nursery plan went through a couple revisions. Originally, I had my heart set on doing a wood or pallet wall. Kinda like this:
 And these were a few of the inspiration nurseries I found on Pinterest that I liked:
 So remember when I was 30-something weeks pregnant with Ellie and
  After I got all the trim done, I wasn't quite sure what I had gotten myself into. Thankfully, my mom came to the rescue to help with the rest of it. Her and William did one coat on Friday night and knocked the other one out Saturday morning.
  Owen and Ellie were great helpers (NOT).
 Then after the paint was done, we put together his
 Ta-da. Paint done and crib is assembled!
 And here is the adorable light I found at Target next to a sweet little owl I picked up a long time ago at Prairie Gardens.
  I’ll post a few more of the individual crafts projects I did and then show you a full tour of his room!



 We took down the ceiling fan that was in there and added one of my favorite things. . .her light. And by we, I mean William and my dad. It's from

 Behind her crib is the one wall I did a paint treatment on. This is absolutely my favorite thing in her room and I almost wish I had done it on all the walls. I love is because it is so subtle. See, in this picture, the walls just look tan.
 Here is a close up of her adorable pink sheets from


 Anywhoo, moving around she has another closet and then you see this wall.


 Here the view from the window seat area.




 Posts
Posts


