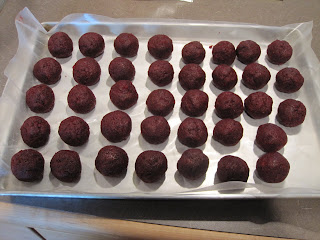
Ingredients:
- 1 box of any flavored cake mix (and the ingredients you need to make the cake)
- 1 container of any flavored frosting (I used the whipped cream cheese frosting and used about 3/4 of it)
- 2 packages of candy melts - I used the white ones from Michaels. That way I could dye the remaining chocolate a color for the decoration. REMEMBER to only use gel food coloring to dye candy melts, as the liquid stuff will ruin your chocolate!
- 1 bag of lollipop sticks (also from Michaels or Hobby Lobby or Walmart)
- 2 tb of shortening
- sheet of Styrofoam
Step 2 - crumble the cake into a large bowl
Step 3 - Add the can of frosting and mix until you can't see the frosting anymore.
I used about 3/4s of the can and ending up mixing with my hands to get it all mixed well.
Step 4 - roll the batter into small balls. I had to wash my hands about 4 times throughout this process.
This is where my pictures fell apart. I lost my helper, so again, I refer you to other blogs (blogher or the pioneer woman) for the chocolate part in pictures and better directions.
I didn't quite follow the directions and it probably would've helped. You're supposed to melt the chocolate (including the shortening to help the chocolate thin for easier dipping and coating), dip the sticks in the melted chocolate, and insert into the cake ball. Then put in the freezer. I must have missed this step because my cake balls kept falling off the sticks when I tried to dip them in the chocolate. And I also didn't have any styrofoam so I had to lay the balls flat which didn't make them quite as pretty all the way around. I melted my chocolate in a double broiler, but you can also use the microwave. I basically spooned the choocalte onto the cake ball and then twirled it to spread it evenly.
Do NOT return them to the freezer. It didn't take long for the chocolate to harden back up. I colored the remaining white chocolate with orange gel food coloring. I put the orange chocolate in a ziploc bag and cut off the corner. Then I just squiggled some in lines and then wrote M4 on some since I was taking them to our M4 marriage small group. They tasted fabulous and I'm sure it would go easier the 2nd time around. But I'm not sure the time is worth how (not so great) mine looked in the end. Cupcakes anyone?


No comments:
Post a Comment